If your shower walls or bathroom floor are looking tired and dingy, learning how to regrout bathroom tile is one of the highest-impact weekend projects a homeowner can take on. You don’t need to remove a single tile. By scraping out the old, cracked, or stained grout and pressing in fresh grout, you can make a ten-year-old bathroom look nearly new — for a fraction of the cost of retiling.
This complete guide to how to regrout bathroom tile walks you through everything: the tools and materials you’ll need, eight proven steps for a professional-looking result, and the sealing finish that protects your work for years. Whether you’re refreshing a shower surround or a bathroom floor, follow along and you’ll get it right the first time.
Table of Contents
What Does It Mean to Regrout Bathroom Tile?
Before diving into how to regrout bathroom tile, it helps to know what regrouting actually is. Grout is the filler between tiles that keeps water out and holds everything stable. In bathrooms it absorbs moisture, soap scum, and mildew over the years, eventually cracking, crumbling, or staining permanently.
Regrouting means cutting out the damaged top layer of old grout — usually the top 1/8 to 1/4 inch — and filling the joints with new grout. You’re not replacing tile or the waterproofing behind it; you’re renewing the visible surface. It’s the same principle as other targeted bathroom repairs: fix the failing part instead of replacing the whole system. Much like learning how to fix a leaky faucet, one focused repair can transform how the whole bathroom feels. The good news is that how to regrout bathroom tile is a realistic DIY job — it takes patience more than skill, and materials typically cost just $30 to $80 for an average shower.
Tools and Materials You’ll Need
Gather everything before you start — mid-project hardware store runs with half-scraped grout lines are miserable.
- Grout saw or oscillating multi-tool with a grout-removal blade
- Utility knife for corners and tight spots
- Sanded grout (joints wider than 1/8 inch) or unsanded grout (narrower joints), in a matching or fresh new color
- Grout float — the rubber paddle for pressing grout into joints
- Two buckets — one for mixing, one for clean rinse water
- Large grout sponges, painter’s tape, and a spray bottle
- Safety glasses, dust mask, and gloves — grout dust is harsh on lungs and skin
- White vinegar or grout haze remover for final cleanup
- Penetrating grout sealer — essential for showers and floors
- Shop vacuum for clearing dust from the joints
Picking the right grout is a key early decision in any how to regrout bathroom tile project. Sanded grout is the standard for wider bathroom joints because it resists shrinking and cracking. Unsanded grout suits narrow joints (1/16 to 1/8 inch). Epoxy grout is the premium, nearly stain-proof option, but it’s harder to work with and costs more. For most homeowners, a quality polymer-modified sanded grout is the sweet spot. For a second expert walkthrough of the technique, The Money Pit’s guide to regrouting tile — featuring This Old House’s Tom Silva — is well worth a look.
How to Regrout Bathroom Tile in 8 Proven Steps
Follow these steps in order. Most regrout mistakes come from impatience, not lack of skill — so don’t rush.
Step 1 – Protect the Area and Yourself
The first rule of how to regrout bathroom tile is that prep beats speed. Lay drop cloths over the tub or shower base, tape off fixtures and drain covers, and gear up with safety glasses, dust mask, and gloves. Removing old grout throws fine silica dust everywhere. Open a window or run the exhaust fan for ventilation.
Step 2 – Remove the Old Grout
Old-grout removal is the most labor-intensive part of how to regrout bathroom tile, and it decides how well the new grout bonds. Cut out the old grout to a depth of at least 1/8 inch with your grout saw or oscillating tool, letting the tool do the work — pressing too hard chips tile edges. Clean out corners by hand with the utility knife. .
Note that joints where tile meets the tub or a different material are usually caulk, not grout; you’ll re-caulk those at the end. Knowing which joints to grout and which to caulk is a small but important part of how to regrout bathroom tile done right. If you find water-damaged drywall behind a loose tile near the vanity, patch it first — our guide on how to repair drywall holes covers that repair
Step 3 – Clean the Joints Thoroughly
Vacuum every joint with the shop vacuum, then wipe with a damp sponge. Any dust left behind weakens the bond, so this cleaning stage of how to regrout bathroom tile matters more than beginners expect. Scrub moldy joints with a stiff brush and bathroom cleaner, rinse well, and let everything dry completely — new grout over damp, dirty joints can fail within months.
Step 4 – Mix the New Grout
Consistency is everything when mixing grout for a how to regrout bathroom tile project. Add powder to water (never the reverse) and mix to a thick peanut-butter consistency that holds its shape on the float. Mix only what you can use in about 30 minutes. Let it slake (rest) 5 to 10 minutes per the manufacturer’s directions, then remix briefly without adding water. If it stiffens while you work, remix it — don’t thin it with extra water, which weakens the cured grout.
Step 5 – Apply the Grout with a Float
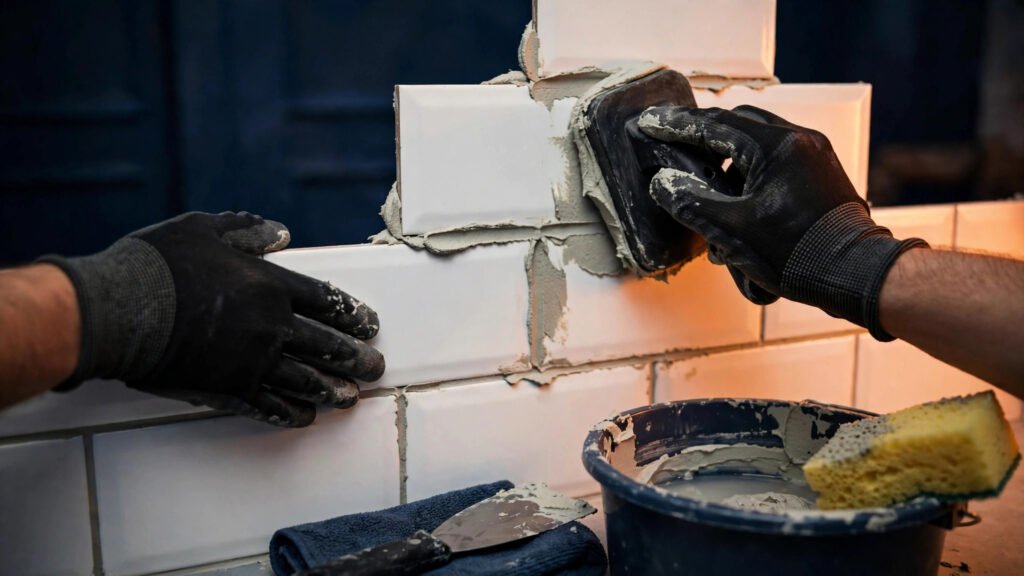
This is the satisfying part of how to regrout bathroom tile: packing the joints. Load grout onto the float and spread it diagonally across the joints, pressing firmly so they fill solidly. Work in small sections — about 3 to 4 square feet at a time. Hold the float at roughly 45 degrees and use firm, sweeping diagonal strokes so the float edge doesn’t dig grout back out.
Step 6 – Wipe and Shape the Joints
After 15 to 30 minutes (check your product’s instructions), wipe diagonally with a damp — not dripping — sponge to clean tile faces and shape the joints, rinsing the sponge often in clean water. Patience here is what separates an average how to regrout bathroom tile result from a professional one: too much water washes grout out of the joints, too little leaves heavy film on the tile. Make two to three light passes, letting the surface firm up slightly between them.
Step 7 – Buff Away the Haze
A few hours later, a cloudy film — grout haze — will remain on the tile faces. The final cosmetic pass in any how to regrout bathroom tile job is buffing it off with a dry, soft cloth in circular motions. For stubborn haze, use a 50/50 water-and-vinegar dampened cloth or a commercial haze remover. On natural stone tile, skip the vinegar and use a pH-neutral remover — acid etches marble, travertine, and limestone.
Step 8 – Seal the Grout
Sealing is the step most guides to how to regrout bathroom tile rush through, yet it protects your work from moisture and staining. Wait 48 to 72 hours for cement-based grout to cure fully, then apply penetrating sealer with a small brush or applicator bottle, wiping excess off tile faces before it dries. Two thin coats is ideal for showers. Test with the water-drop test: flicked water should bead on sealed grout, not soak in.
Pro Tips for Longer-Lasting Grout
Ventilation is the best-kept secret of how to regrout bathroom tile longevity. Run the exhaust fan during and 30 minutes after every shower — chronic moisture is grout’s number one killer. Squeegeeing shower walls after use cuts drying time dramatically. Choose grout color strategically too: medium gray or warm beige hides everyday wear far better than bright white. And never grout the joint where tile meets the tub — that movement joint needs flexible silicone caulk, since rigid grout there cracks within months.
These small habits decide how many years your work lasts — the how to regrout bathroom tile process doesn’t end when the sealer dries. While you’re refreshing the bathroom, check the toilet as well: our guide on how to fix a running toilet stops hundreds of wasted gallons a month in seven steps.
Common Mistakes to Avoid
- Skimming new grout over old, failing grout. It needs a clean channel at least 1/8 inch deep to bond — skim coats crumble within a year.
- Over-watering the mix or sponge. Excess water weakens grout and causes discoloration and shrinkage cracks. Damp, not wet.
- Working too large an area at once. Grout that sets before you sponge it is brutal to clean off tile faces.
- Sealing too early. Trapped moisture under sealer causes cloudiness and poor adhesion — wait the full cure time.
- Using grout instead of caulk at changes of plane. Corners and tub-to-tile joints need flexible caulk.
Frequently Asked Questions
How long does it take to regrout bathroom tile?
For an average tub surround or small shower, expect 4 to 8 hours of active work spread over two to three days: removal and cleaning one day, grouting the next, and sealing on a third day after curing. A bathroom floor of similar size takes about the same. First attempts run slower — that’s normal.
Can I put new grout over old grout?
You can, but don’t expect it to last. New grout needs a clean, roughened channel at least 1/8 inch deep to bond. A thin skim coat typically cracks and flakes within months in a wet shower. Proper removal is what makes the job durable.
How much does DIY regrouting cost?
Most DIY shower or floor regrout jobs cost $30 to $80 in materials: grout ($15–$30), a grout saw or removal blade ($10–$25 if you don’t own one), sponges, and sealer ($10–$20). A professional regrout typically runs $300 to $800+, so the DIY savings are substantial.
Sanded or unsanded grout for the bathroom?
Sanded grout for joints wider than 1/8 inch — stronger and shrink-resistant, covering most bathroom floors and many shower walls. Unsanded grout for narrow joints (1/16 to 1/8 inch), common with polished tile. When in doubt, match what was there before.
How often should bathroom grout be resealed?
Reseal shower and floor grout every 1 to 2 years depending on use and ventilation. Test annually: if water soaks in instead of beading, reseal. Regular resealing is the cheapest insurance for the regrout work you just did.
Final Thoughts
Now that you know how to regrout bathroom tile, you hold one of the most cost-effective bathroom upgrades in the DIY playbook. A weekend of careful work — thorough removal, clean joints, properly mixed grout, and a good sealer — takes a bathroom from dated and dingy to fresh and clean without replacing a single tile. Once you’ve done it, how to regrout bathroom tile becomes a skill you’ll reuse in every bathroom you own.
Give the removal and the sponging stages your full patience; those two decide the final quality more than anything else. Keep the fan running, reseal on schedule, and your new grout will look great for years. For more small repairs that keep a home feeling new, see our guides on fixing a leaky faucet and repairing drywall holes.
Pingback: How to Caulk a Bathtub: 10 Proven Steps for a Perfect Seal
Pingback: How to Install a Kitchen Backsplash: 9 Proven Steps for a Pro-Looking Finish