Roof leaks rarely start in the middle of a shingle field. More often, water sneaks in where the roof meets a wall, a chimney, or a vent — exactly the spots that flashing is supposed to protect. If you have a drip around a chimney, a pipe boot, or a valley, learning how to seal roof flashing can save you hundreds of dollars in water damage and spare you worry every time it rains.
Flashing is thin sheet metal — usually aluminum, galvanized steel, or copper — installed at every roof penetration and intersection to direct water away from vulnerable joints. Over time, sealant shrinks, caulk cracks, and metal lifts, so knowing how to seal roof flashing is one of the most useful DIY roofing skills a homeowner can master. This guide walks you through nine proven steps, from inspection to final water test, so you can stop leaks at the source.
Table of Contents
What Is Roof Flashing and Why Does It Leak?
Roof flashing is a system of thin metal pieces fitted wherever the roof surface is interrupted: around chimneys, skylights, and vent pipes, along valleys where two slopes meet, and anywhere the roof abuts a wall or dormer. Its only job is to channel water onto the shingles and away from the joints where it could soak into the roof deck.
Flashing usually fails long before the shingles do. Ultraviolet exposure dries out the original sealant, seasonal expansion and contraction break the bond between metal and masonry, and wind can lift loose edges just enough for wind-driven rain to get underneath. Rust is another culprit on older galvanized flashing, eating tiny pinholes that leak even when the sealant on top still looks fine.
The good news is that most flashing problems are sealing problems, not structural ones. Homeowners searching for how to seal roof flashing are usually dealing with cracked caulk, small gaps, or lifted edges — all fixable from the rooftop with basic tools. Understanding how to seal roof flashing properly means knowing where the leak actually starts, choosing the right sealant, and preparing the surface so the new seal holds for years.
Tools and Materials You’ll Need
Before learning how to seal roof flashing hands-on, gather everything so you only have to climb the ladder once.
- Sturdy extension ladder and a spotter
- Roof safety harness and non-slip shoes
- Putty knife and flat pry bar
- Stiff wire brush and a broom
- Caulk gun and utility knife
- Polyurethane roof sealant rated for outdoor use
- Self-adhesive butyl flashing tape
- Asphalt roofing cement for larger gaps
- Replacement flashing and galvanized roofing nails
- Work gloves, safety glasses, and a garden hose
How to Seal Roof Flashing in 9 Proven Steps
By the time you finish these steps, you will know exactly how to seal roof flashing from diagnosis to final water test. Follow them in order — the first four steps are the prep work that makes or breaks the repair.
Step 1: Inspect and Find the Leak Source
The first rule of how to seal roof flashing is to fix the actual leak, not just the stain on your ceiling. Water often travels along rafters and decking before it drips inside, so trace the stain back to its highest point. On the roof, look for cracked or missing sealant, lifted flashing edges, rust spots, and gaps where flashing meets masonry. For a complete walkthrough of the inspection process, see our guide on how to inspect your roof for damage.
Step 2: Set Up Your Ladder Safely
Place your extension ladder on firm, level ground and extend it at least three feet above the roof edge. Wear non-slip shoes and a safety harness anchored to a secure point on steep or high roofs. Never work on a wet roof, and keep a spotter at the base of the ladder whenever you climb.
Step 3: Clean the Flashing and Surrounding Area
Clear leaves, grit, and loose granules from the flashing and surrounding shingles. Scrub the metal with a stiff wire brush to remove oxidation, paint flakes, and surface rust, then wipe the joints with a dry rag. If the area is damp, let it dry completely — most roof sealants bond poorly to wet surfaces.
Step 4: Remove Old Sealant and Loose Material
Use a putty knife or flat pry bar to cut away all cracked, peeling, or crumbly sealant. Clear old caulk from each gap so the new sealant bonds directly to clean metal and masonry. Pull loose roofing nails and reseat them, or drive fresh galvanized nails in their place.
Step 5: Repair or Replace Damaged Flashing
Sealant can bridge small gaps, but it cannot replace bent or rusted-through metal. Straighten minor bends with the pry bar, and cut out any flashing with rust holes or deep pitting. Slide the replacement piece under the surrounding shingles, following the original overlap, and fasten it with galvanized roofing nails hidden by the next shingle course. If nearby shingles are cracked or missing, fix them now — our guide on how to replace roof shingles walks through that repair.
Step 6: Apply New Sealant Along Joints and Seams
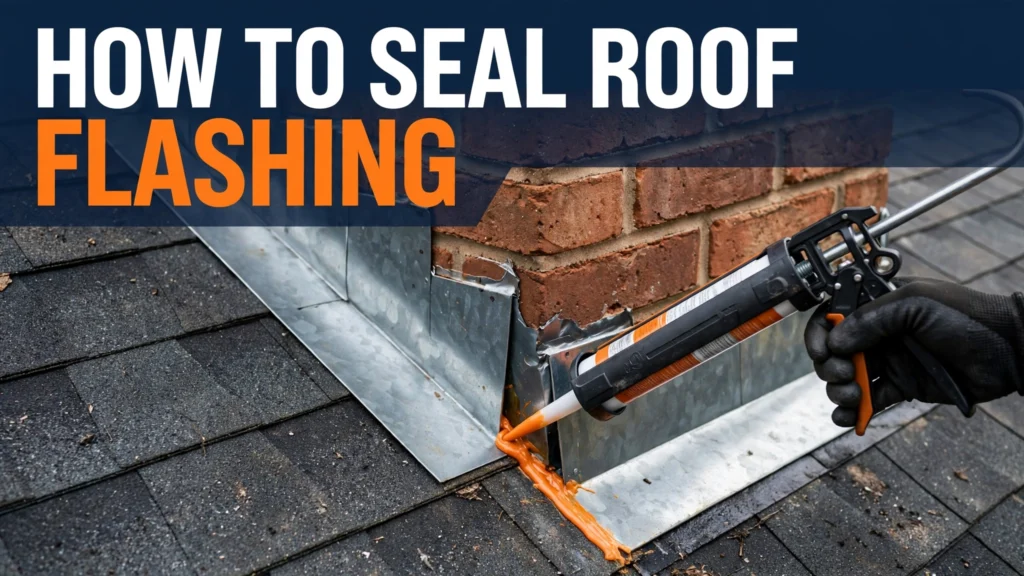
Cut the sealant tube nozzle at a 45-degree angle and load it into the caulk gun. The core technique of how to seal roof flashing is simple: run a continuous bead of polyurethane roof sealant along every joint where flashing meets another material — chimney mortar lines, vent pipe collars, step flashing edges, and valley seams. Press the bead firmly into the joint so it fills the gap rather than just bridging the top.
Step 7: Reinforce Vulnerable Seams with Flashing Tape
On wide gaps, inside corners, and any joint that flexes with temperature changes, press self-adhesive butyl flashing tape over the fresh sealant. Cut the tape to length, peel the backing, and press it firmly into the bead so it bonds on both sides of the joint.
Step 8: Tool and Smooth the Sealant
Run a gloved finger or a caulking tool along each bead to smooth it into a concave profile that sheds water.
Step 9: Water-Test and Do a Final Inspection
The last part of learning how to seal roof flashing is proving the repair works. Have a helper watch inside the attic while you run a garden hose over the flashing, starting low and working up. Soak each section for several minutes before you pack up the ladder.
How to Seal Roof Flashing: Choosing the Right Sealant
Choosing the right product matters as much as technique when you learn how to seal roof flashing. Polyurethane roof sealant is the best all-around choice for most homeowners — it bonds to metal, masonry, and asphalt shingles, stays flexible through freeze-thaw cycles, and resists UV breakdown.
Silicone roof sealants are also durable and highly UV-resistant, but they cannot be painted and will not bond well over old residue, so surface prep must be thorough. Traditional asphalt roofing cement works for emergency patches and large gaps, though it dries rigid and cracks sooner in climates with big temperature swings. This This Old House guide on leakproof flashing explains how pros layer flashing and sealant to keep water out.
Whatever you choose, avoid standard bathroom or window caulk — it is not formulated for constant UV exposure and roof temperatures. Look for a product labeled specifically for roofing or flashing. The best sealant for how to seal roof flashing projects is one that stays flexible, such as a polyurethane formula with a long durability rating.
Common Mistakes to Avoid When Sealing Roof Flashing
The biggest mistake when learning how to seal roof flashing is caulking over a dirty or damp surface — the sealant bonds to the grime instead of the flashing and peels away within a season. Other frequent errors include using indoor caulk outdoors, sealing over weep holes and drainage gaps that are supposed to stay open, and globbing sealant on top of rusted-through metal instead of replacing it.
Temperature matters too. Most roof sealants need temperatures above 40°F (about 4°C) to cure properly. Never seal during active rain — trapped moisture will undermine the repair. If water is already coming in, handle the emergency first with our guide on how to fix a roof leak, then do the permanent flashing repair in dry weather.
Frequently Asked Questions
How long does sealed roof flashing last?
A properly applied polyurethane seal typically lasts 10 to 20 years. Inspect it every couple of years and touch up cracks before they become leaks.
Can I seal flashing without removing shingles?
Yes, in most cases. Surface resealing — cleaning, removing old caulk, and applying new sealant — does not require lifting shingles. Learning how to seal roof flashing at the surface level saves you from tearing into the roof unnecessarily. You only need to disturb shingles if the flashing itself is damaged and must be replaced.
What is the best sealant for roof flashing?
Polyurethane roof sealant is the best choice for most homeowners because it bonds well to metal, masonry, and shingles while staying flexible for years. Silicone roof sealants are a strong runner-up in high-UV climates.
Should I DIY or hire a roofer?
Resealing intact flashing is a solid DIY project if you are comfortable on a ladder. Call a roofer if the flashing is extensively corroded, the roof is steep, or the leak persists after your repair.
How often should I inspect my roof flashing?
Inspect flashing at least twice a year — once in spring and once in fall — and after any major storm. Catching cracked sealant early is the whole point of knowing how to seal roof flashing: a five-minute touch-up now prevents a ceiling repair later.
Final Thoughts
Now that you know how to seal roof flashing, you have one of the most valuable skills in home maintenance. Nine careful steps — inspect, prep, clean, strip, repair, seal, reinforce, tool, and test — turn a dreaded leak into a weekend project you can finish before lunch.
Pingback: How to Install a Ridge Vent: 9 Proven Steps for Better Attic Ventilation
Pingback: How to Fix Sagging Gutters: 10 Proven Steps for Lasting Drainage
Pingback: How to Fix a Leaking Skylight: 9 Proven Steps for a Watertight Roof - Fixora Works
Pingback: Roof Repair: What It Really Costs and 7 Fixes That Save You Money