A heat gun is one of the most underrated tools a homeowner can own. If you are learning how to use a heat gun for the first time, you are about to unlock a tool that strips paint faster than any chemical, softens stubborn adhesives in minutes, and shrinks electrical tubing with a professional finish. Unlike an open flame, a heat gun blows superheated air — typically between 200°F and 1,200°F — giving you precise, flameless control.
But that power demands respect: hold it in one spot too long and you can scorch wood, blister paint you wanted to keep, or start a fire. In this guide, you will learn exactly how to use a heat gun safely with nine proven tips, the most practical home projects it handles, and the mistakes to avoid.
Table of Contents
What Is a Heat Gun and How Does It Work?
A heat gun looks like a hair dryer on steroids, and it works on the same principle: an electric fan forces air across a superheated element and out through a focused nozzle. Most homeowner models offer at least two temperature settings — a low range around 300–500°F for delicate work like shrinking tubing or drying paint, and a high range of 750–1,100°F for stripping paint and softening adhesives.
Learning how to use a heat gun properly starts with matching the temperature to the job. The low setting is your default for anything near plastic, wiring, or finished surfaces you want to protect. The high setting is reserved for paint removal, loosening rusted hardware, and work on bare metal or masonry. Variable-temperature models with digital displays cost more, but they make it far easier to dial in the right heat — a worthwhile upgrade once you know how to use a heat gun and reach for it regularly.
Heat Gun Safety: 7 Rules to Follow Every Time
Before you learn how to use a heat gun on a real project, lock in these safety rules. A heat gun will not set your house on fire by itself — careless habits will.
- Wear heat-resistant gloves and safety glasses. The nozzle and the heated surface stay dangerously hot for several minutes after you release the trigger.
- Work in a ventilated area. Heating old paint, adhesives, or plastics releases fumes. Open windows and doors, and wear a respirator when stripping old coatings.
- Keep a fire extinguisher within reach. One distracted moment near dry wood or sawdust is all it takes to need one.
- Never leave a hot heat gun unattended. Set it down nozzle-up on its built-in stand — never on its side, never on the workbench.
- Keep the intake vents clear. A blocked vent starves the fan and overheats the element.
- Unplug it during breaks. The gun cools in minutes; unplugging is faster than explaining a scorch mark.
- Move flammables away. Clear solvents, rags, sawdust, and paint cans from your work zone before you start.
One critical warning: homes built before 1978 may have lead-based paint. Do not use a heat gun on suspected lead paint — the fumes and dust are toxic. Have the surface tested first, or call a certified lead-abatement professional.
How to Use a Heat Gun in 9 Proven Steps
This is the core method for how to use a heat gun on almost any homeowner project, from stripping a windowsill to thawing a pipe. Follow these nine steps in order for clean, controlled results every time.
Step 1: Clear and Prep Your Work Area
Remove flammables, lay a drop cloth to catch paint chips, and make sure you have good lighting and ventilation. Position the power cord so it cannot snag. A few minutes of prep prevents nearly every heat gun accident and makes the work itself far smoother — a tidy workspace is the unsung first lesson in how to use a heat gun safely.
Step 2: Choose the Right Nozzle Attachment
Snap on the attachment that fits the job. Use the fishtail (wide) nozzle for stripping large flat areas like door frames, the reducer (narrow) nozzle for detail work around trim, and the reflector nozzle for wrapping heat around pipes or wire bundles. The right attachment focuses the heat where you need it when you learn how to use a heat gun efficiently.
Step 3: Start on the Low Temperature Setting
Always begin on low. The most common beginner error when learning how to use a heat gun is cranking it to maximum immediately. Low heat handles most tasks — shrinking tubing, drying filler, softening caulk — and you can always step up. Starting low teaches you how the tool behaves and keeps you from scorching the workpiece.
Step 4: Hold the Nozzle 2–3 Inches From the Surface
Angle the gun at roughly 45 degrees and keep it moving in slow, overlapping passes. Never park the nozzle in one spot: stationary heat builds up fast and will blister paint, char wood, or melt plastic within seconds. This moving-passes habit is the single most important technique when you learn how to use a heat gun.
Step 5: Watch for the Material’s Response, Then Act
When stripping paint, you will see it bubble and lift — that is your signal to follow with a scraper in your other hand. Softening adhesive? The surface goes slightly glossy. The key skill in learning how to use a heat gun is reading these visual cues instead of watching the clock. Let the material tell you when it is ready, then work it while it is warm.
Step 6: Work in Small Sections
Do not try to heat an entire door at once. Work in patches of about 6–12 inches and complete each section before moving on. Small sections stay manageable, and you never lose track of which areas are hot. Patience in small sections pays off when you are learning how to use a heat gun — it is the difference between a tidy one-afternoon project and a half-stripped mess that sits in the garage for a month.
Step 7: Step Up the Heat Only If Low Is Not Working
If low heat is not softening the material after several passes, switch to high — but shorten your passes and watch the surface more closely. High heat is a finishing gear, not a starting gear. The moment the job starts responding, drop back to low. Knowing how to use a heat gun at the right temperature for each moment is what separates clean results from scorched ones.
Step 8: Cool the Tool Before Setting It Down
When you finish — or take a break — run the gun on its cool or fan-only setting for 30–60 seconds if your model has one. Then set it nozzle-up on its stand and let it cool for at least 10 minutes before packing it away. A proper cool-down is a core part of how to use a heat gun responsibly. The nozzle and the heated workpiece stay hot long after the fan stops, so keep kids and pets away until everything is cool to the touch.
Step 9: Clean Up and Store the Heat Gun Safely
Sweep up paint chips and debris, coil the cord loosely, and store the gun with its nozzles in a dry place. Check the intake vents for dust before your next use. A clean, well-stored heat gun will last for years and perform like new every time you pull it out — which is exactly why learning how to use a heat gun is such a good investment for any homeowner.
How to Use a Heat Gun on 7 Practical Home Projects
Once you know how to use a heat gun, you will find excuses to reach for it constantly. Here are the projects where it truly shines:
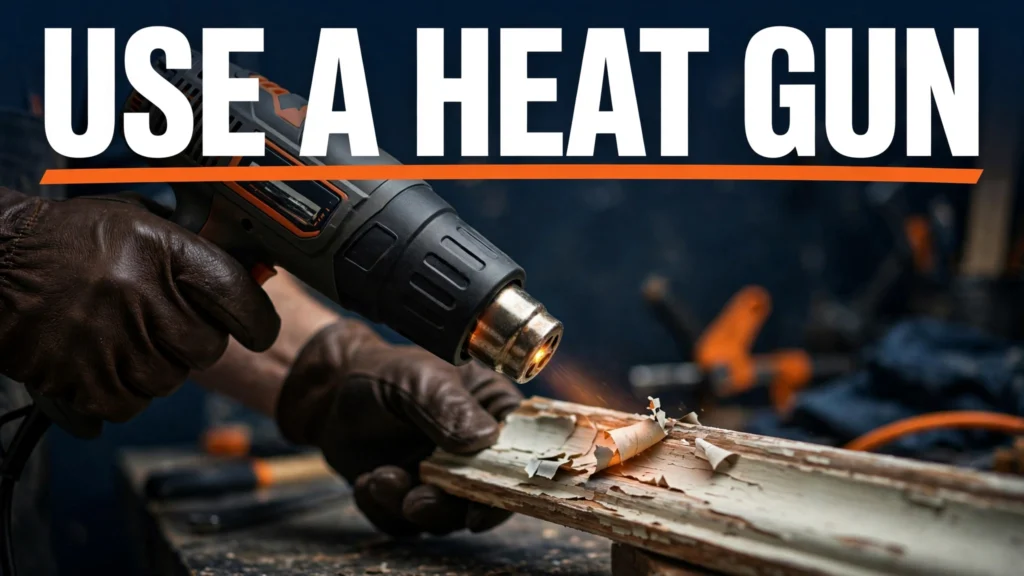
Stripping paint from trim and doors. The classic heat gun job. Heat the old paint until it bubbles, then scrape it clean in long strokes. It beats chemical strippers on speed and never soaks your wood in solvents.
Softening old caulk and adhesive. Re-caulking a tub? A minute of heat makes rock-hard old caulk peel away in ribbons. The same trick works on vinyl floor adhesive and old stickers — then follow our guide to using a caulk gun when you lay fresh caulk.
Thawing frozen pipes. A heat gun on low, waved slowly along a frozen section, is one of the safest ways to thaw a pipe — no open flame. Work from the faucet end back toward the frozen spot and keep the gun moving. For the full procedure, see our guide on how to thaw frozen pipes.
Shrinking heat-shrink tubing. For automotive or electronics wiring, a heat gun gives a far more even shrink than a lighter — no scorch marks, no melted insulation.
Loosening rusted bolts and nuts. A blast of heat expands the metal and breaks the corrosion bond. Heat the nut (not the bolt) for 30–60 seconds, then turn it while it is still hot.
Bending PVC conduit and plastic trim. Gentle, even heat makes PVC pliable enough to bend by hand — perfect for custom conduit runs or fitting flexible trim.
Drying paint, filler, and glue in a hurry. Low heat dramatically speeds up drying time for wood filler, touch-up paint, and adhesives on a deadline day.
Common Heat Gun Mistakes to Avoid
Even experienced DIYers slip up when they get complacent about how to use a heat gun. Dodge these mistakes and your results will stay clean:
- Parking the nozzle in one spot. Mistake number one — it causes scorching in seconds. Keep the gun moving at all times.
- Starting on high heat. High is for stubborn jobs, not warm-ups. Start low and step up only when needed.
- Using it on lead paint. Heating lead-based paint is a serious health hazard. Test first if your home predates 1978.
- Pointing it at glass. Rapid, uneven heating can crack window panes. Shield glass with a metal putty knife when stripping nearby trim.
- Skipping the gloves. The nozzle, the workpiece, and even the handle area get hot. Gloves are non-negotiable.
- Forgetting the cool-down. Packing away a hot heat gun melts the case lining and can scorch whatever it touches in the toolbox.
Frequently Asked Questions
Can I use a heat gun to remove paint from wood?
Yes — paint stripping is the most popular reason homeowners learn how to use a heat gun. Hold the gun 2–3 inches from the surface at a 45-degree angle, wait for the paint to bubble, and scrape it off with a putty knife. Work in small sections, wear a respirator, and never use a heat gun on paint you suspect contains lead.
What temperature should a heat gun be for stripping paint?
Start around 500–700°F and increase only if the paint resists. Most latex and oil-based paints soften well in this range. If your heat gun only has low/high settings, start on low and switch to high for stubborn layers — just keep the gun moving so you do not scorch the wood underneath.
Is a heat gun safe to use indoors?
Yes, with ventilation. Open windows and doors, wear a respirator when heating paint or adhesives, and keep a fire extinguisher nearby. Never use a heat gun near gas lines, pilot lights, or flammable vapors — and clear the area of solvents and sawdust first. Safe indoor use is a big part of learning how to use a heat gun responsibly.
Can a heat gun thaw frozen pipes?
Yes, and it is safer than a propane torch because there is no open flame. Use the low setting, keep the gun moving along the pipe, and work from the faucet toward the frozen section so melting water has somewhere to go. For a detailed walkthrough, read our guide on how to thaw frozen pipes.
How do I prep a surface before a repair?
Heat the paint until it bubbles, scrape it clean, then sand the bare surface smooth before patching. This matters for repairs too — for example, when you fix cracked floor tiles, starting with a clean, paint-free surface helps adhesives bond properly. And when you are done stripping, a steady hand with a caulk gun gives your fresh trim lines a professional finish.
Final Thoughts
A heat gun earns its place in your toolbox the first time you strip a windowsill in minutes instead of hours. Now that you know how to use a heat gun safely — start low, keep it moving, watch the material, and respect the cool-down — you can tackle paint stripping, adhesive removal, pipe thawing, and dozens of other jobs with total confidence. For more expert technique and safety guidance, see Bob Vila’s in-depth guide on using a heat gun. Buy a model with variable temperature control, grab the nozzle set it comes with, and put it to work on your next project. You will wonder how you ever got by without one.
Pingback: How to Replace a Broken Window Pane: 9 Proven Steps for a Safe Repair - Fixora Works